Our Network


Coming Soon


Coming Later

Custom Stamp Maker

Online PNG Maker

World's simplest online PNG stamp maker. Just specify the shape, size, and color of the stamp that you need in the tool options below, and you'll instantly get a custom digital PNG stamp with personalized text in the output editor. Free, quick, and very powerful. Created with love by team Browserling.

Tool Options

Stamp Design

Choose your stamp's design.
Main text of the stamp.
Main text size.
Stamp width.
Stamp height.
Stamp height is used only for rectangular designs and designs without a border.
Outer border width.
Padding around the stamp.
Stamp quality in percentage. (Quality below 100% adds gaps and missing ink spots.)

Stamp Decoration

Create an inverted stamp design. Its background gets filled and elements get cut out.
Select the stamp border's style.
Secondary text of the stamp.
Inner border's width.
Decorate the stamp with stars.
Decorate the stamp with lines.
Rotate the stamp by this angle. (Measured in degrees.)

Stamp Color

Set the stamp color.
Set the text color.
Set the decoration color.
Set the background color.
Set the opacity of the stamp.

Stamp Font

Font for the primary text:
Choose the main text font.
Provide a custom font URL.
Select bold or italic font.
Font for the second text:
Choose the second text font.
Provide a custom font URL.
Select bold or italic font.

What Is a Custom Stamp Maker?

This tool lets you create custom digital and rubber stamps with personalized text, color, shape, and size. You can design stamps for various purposes, such as product branding, document verification and marking, and artistic design. For example, you can create an official stamp for business documents, such as "Approved" (in green color), "Confidential" (in red color), or "Rejected" (also in red color). Or, you can create a branded stamp for your business or store, such as "Handmade", "Limited Edition", or "Eco-friendly". It can also be used to create a custom seal design. In the tool options, you can select the stamp's shape. It can be a circle, oval, ellipse, rectangle, or square. Each of the shapes can also have extra lines or have no border at all. If you select a stamp without a border, then you'll get a plain text stamp. To create a stamp, first select the preferred stamp design from the list and specify the text that should be printed on the stamp. For round, circular, and oval stamp designs, you only need to specify the width of the stamp. If the stamp is round, then the height will be equal to the length. If the stamp is oval, the height will be two thirds of its width. For rectangular, square, and plain text designs, you can adjust both the width and height of the stamp in the options. To create a square stamp, you can set the width equal to the height. If you are creating a stamp with a border, its width can be set in pixels as a numeric value in the options. If you're creating a rubber stamp imprint, then the option to add extra empty padding around the stamp's design will come handy. This extra padding keeps the ink from getting on the edges of the stamp, which prevents smudging and gives you a cleaner stamp impression. The tool also allows you to adjust the quality of a digital stamp via the quality option. This feature adds intentional ink gaps and missing ink spots on the stamp. These imperfections mimic the appearance of a real stamp often seen when using physical rubber stamps on paper, where the ink does not leave an imprint in certain areas. To make your stamp more detailed or minimalist, you can add or remove decorations, as well as change the border style. In particular, you can turn a regular stamp into a filled version, where the design has a filled background and all decorative elements and text are cut out. You can customize the border style and choose a standard border, wavy border, spiky border, or add star-shaped edges. If you need to include more information on the stamp, the tool allows you to add a second line of text to the stamp. Additionally, for a more pronounced design, you can include a double border and adjust its thickness separately. To further enhance the aesthetics of the stamp, you can also add decorative elements such as extra stars and lines that appear inside the stamp near the text. If you need to tilt or fully rotate the stamp, you can use the rotation option to set the desired rotation angle in degrees. The color customization options allow you to specify separate colors for the stamp border, text, decorations, and background. If you choose a filled stamp design, only two colors are required – the fill color of the stamp and the background color. You can adjust the stamp's opacity, making it fully visible at 100% or more transparent at lower values. You can also give the stamp a unique writing style by selecting fonts for the primary and secondary text. You can switch between existing text fonts or upload a custom font by selecting the custom font mode from the fonts list and entering the font's URL into the "font-URL" options field. Additionally, any text on the stamp can be made bold or italic. Png-abulous!


Custom Stamp Maker Examples

Click to try!
click me

Round Approved Stamp

In this example, we create a custom stamp design for office use to mark approved documents and contracts. The stamp has a round shape with bold text in the center that says "APPROVED" in green color. It also features a double border and duplicated text along the circle's arc. The extra stars and lines that are used for decoration are also green. The stamp's quality is set to 60%, which introduces some empty spots and imperfections, mimicking an imprint of a real ink stamp on paper.

Required options
These options will be used automatically if you select this example.
Choose your stamp's design.
Main text of the stamp.
Main text size.
Stamp width.
Stamp height.
Outer border width.
Padding around the stamp.
Stamp quality in percentage. (Quality below 100% adds gaps and missing ink spots.)
Create an inverted stamp design. Its background gets filled and elements get cut out.
Select the stamp border's style.
Secondary text of the stamp.
Inner border's width.
Decorate the stamp with stars.
Decorate the stamp with lines.
Rotate the stamp by this angle. (Measured in degrees.)
Set the stamp color.
Set the text color.
Set the decoration color.
Set the background color.
Set the opacity of the stamp.
Choose the main text font.
Provide a custom font URL.
Select bold or italic font.
Choose the second text font.
Provide a custom font URL.
Select bold or italic font.
click me

Oval Rejected Stamp

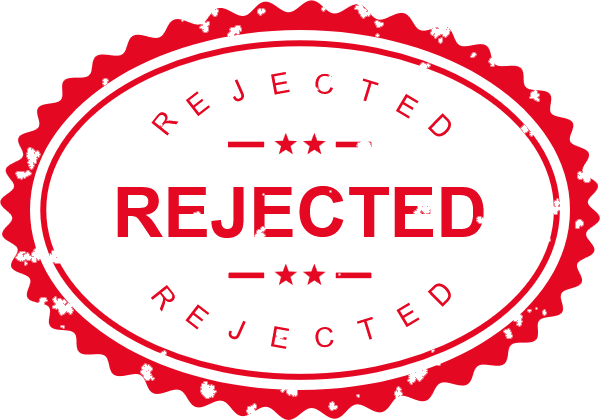
In this example, we generate an oval digital stamp in PNG format with the text "REJECTED" written on it in bright red capital letters. It's designed for marking rejected job applications, invoices, and quotes. The stamp's design has an extra border, secondary text along the ellipse, and decorative stars and lines. The outer border style is changed to a wavy one, and the quality is set to 70%, adding slight ink imperfections for a more realistic look.

Required options
These options will be used automatically if you select this example.
Choose your stamp's design.
Main text of the stamp.
Main text size.
Stamp width.
Stamp height.
Outer border width.
Padding around the stamp.
Stamp quality in percentage. (Quality below 100% adds gaps and missing ink spots.)
Create an inverted stamp design. Its background gets filled and elements get cut out.
Select the stamp border's style.
Secondary text of the stamp.
Inner border's width.
Decorate the stamp with stars.
Decorate the stamp with lines.
Rotate the stamp by this angle. (Measured in degrees.)
Set the stamp color.
Set the text color.
Set the decoration color.
Set the background color.
Set the opacity of the stamp.
Choose the main text font.
Provide a custom font URL.
Select bold or italic font.
Choose the second text font.
Provide a custom font URL.
Select bold or italic font.
click me

Rectangular Filled Stamp

In this example, we choose the rectangular stamp shape and create a rubber stamp imprint with the text "RETURN TO SENDER". For this type of stamp, we specify both width and height (860x200 pixels) to fit the text perfectly. The stamp is filled with the black color (filled stamp mode is turned on), and the text and decorative elements are cut out. In filled stamp mode, the background makes contact with the paper and leaves an imprint, while the text remains uninked, creating a stencil-like effect. Additionally, we add a thick outer border of 20 pixels and a thin decorative inner border of 6 pixels. We also turn the stamp by 10 degrees counterclockwise to make it look more real. When a stamp is slightly rotated, it looks a little off, similar to when someone does it by hand. This high-quality rubber stamp is used by postal services for marking undelivered mail.

Required options
These options will be used automatically if you select this example.
Choose your stamp's design.
Main text of the stamp.
Main text size.
Stamp width.
Stamp height.
Outer border width.
Padding around the stamp.
Stamp quality in percentage. (Quality below 100% adds gaps and missing ink spots.)
Create an inverted stamp design. Its background gets filled and elements get cut out.
Select the stamp border's style.
Secondary text of the stamp.
Inner border's width.
Decorate the stamp with stars.
Decorate the stamp with lines.
Rotate the stamp by this angle. (Measured in degrees.)
Set the stamp color.
Set the text color.
Set the decoration color.
Set the background color.
Set the opacity of the stamp.
Choose the main text font.
Provide a custom font URL.
Select bold or italic font.
Choose the second text font.
Provide a custom font URL.
Select bold or italic font.
click me

Square Special Offer Stamp

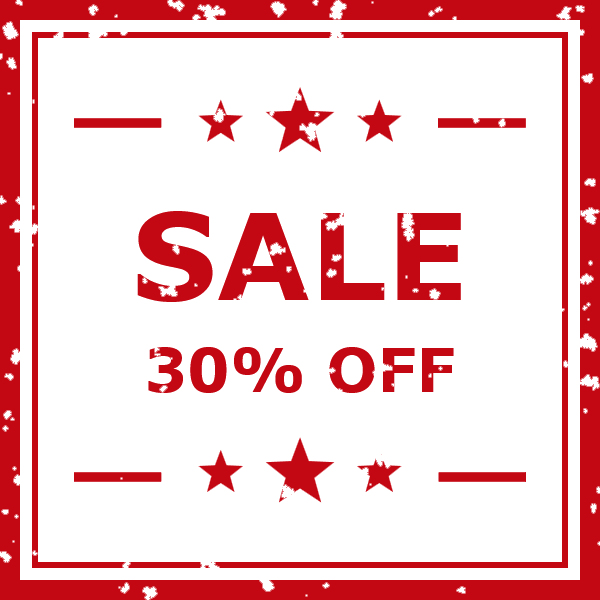
This example generates a square stamp of dimensions 600-by-600 pixels, featuring a special offer in our store. It uses 120-pixel text "SALE" in Verdana font as the main text and additional text that says "30% OFF". The stamp is printed in a vibrant red color on on a white background, and it's decorated with extra lines and stars. The quality is set to 75%, adding some realistic imperfections to it.

Required options
These options will be used automatically if you select this example.
Choose your stamp's design.
Main text of the stamp.
Main text size.
Stamp width.
Stamp height.
Outer border width.
Padding around the stamp.
Stamp quality in percentage. (Quality below 100% adds gaps and missing ink spots.)
Create an inverted stamp design. Its background gets filled and elements get cut out.
Select the stamp border's style.
Secondary text of the stamp.
Inner border's width.
Decorate the stamp with stars.
Decorate the stamp with lines.
Rotate the stamp by this angle. (Measured in degrees.)
Set the stamp color.
Set the text color.
Set the decoration color.
Set the background color.
Set the opacity of the stamp.
Choose the main text font.
Provide a custom font URL.
Select bold or italic font.
Choose the second text font.
Provide a custom font URL.
Select bold or italic font.
click me

Date and Time Stamp

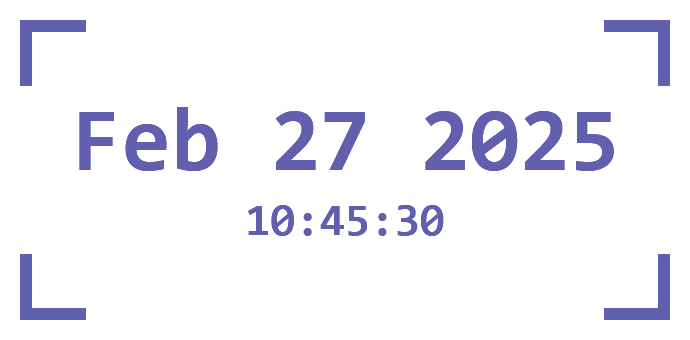
In this example, we create a stamp with today's date and time. Such stamps are useful for tracking documents over time, keeping official records, and marking urgent same-day approvals. The primary text line on the stamp displays the current date, while the secondary text line shows the exact time. The design is minimalist, with no borders but only corner markers. The date and time are printed in monospace font and blue ink color. To make sure the stamp's text never hides anything important in documents, we make the stamp slightly transparent by setting its opacity to 80%.

Required options
These options will be used automatically if you select this example.
Choose your stamp's design.
Main text of the stamp.
Main text size.
Stamp width.
Stamp height.
Outer border width.
Padding around the stamp.
Stamp quality in percentage. (Quality below 100% adds gaps and missing ink spots.)
Create an inverted stamp design. Its background gets filled and elements get cut out.
Select the stamp border's style.
Secondary text of the stamp.
Inner border's width.
Decorate the stamp with stars.
Decorate the stamp with lines.
Rotate the stamp by this angle. (Measured in degrees.)
Set the stamp color.
Set the text color.
Set the decoration color.
Set the background color.
Set the opacity of the stamp.
Choose the main text font.
Provide a custom font URL.
Select bold or italic font.
Choose the second text font.
Provide a custom font URL.
Select bold or italic font.
click me

Colorful Address Stamp

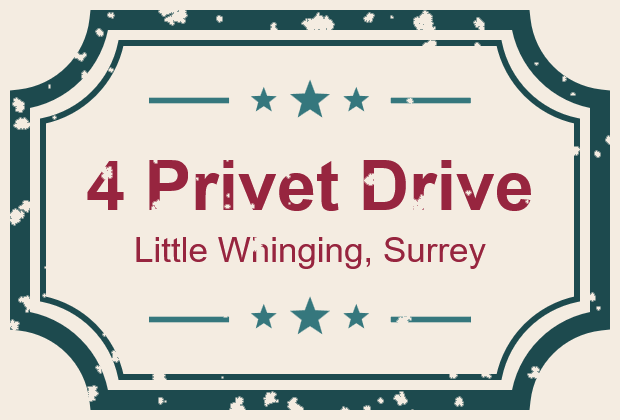
In this example, we show how to create a custom address stamp in the shape of a ticket. The stamp displays the street number, name, city, and county in Helvetica font. It's very detailed and uses different colors for all stamp elements: dark turquoise for the border, light turquoise for lines and stars, burgundy for the text, and biscuit for the background. The stamp quality is set to 60%, adding many imperfections and ink spots.

Required options
These options will be used automatically if you select this example.
Choose your stamp's design.
Main text of the stamp.
Main text size.
Stamp width.
Stamp height.
Outer border width.
Padding around the stamp.
Stamp quality in percentage. (Quality below 100% adds gaps and missing ink spots.)
Create an inverted stamp design. Its background gets filled and elements get cut out.
Select the stamp border's style.
Secondary text of the stamp.
Inner border's width.
Decorate the stamp with stars.
Decorate the stamp with lines.
Rotate the stamp by this angle. (Measured in degrees.)
Set the stamp color.
Set the text color.
Set the decoration color.
Set the background color.
Set the opacity of the stamp.
Choose the main text font.
Provide a custom font URL.
Select bold or italic font.
Choose the second text font.
Provide a custom font URL.
Select bold or italic font.
click me

Signature Stamp

In this example, we create a digital version of a signature that can be used as a stamp for documents, eliminating the need to sign them manually. The signature uses a custom cursive font, Parisienne, loaded via Google Fonts URL. The subtitle below reads "CEO & Founder", and it's printed in a sans-serif Verdana font. The stamp is a solid black color and uses a simple design without borders or decorations, making it look just like a real handwritten signature.

Required options
These options will be used automatically if you select this example.
Choose your stamp's design.
Main text of the stamp.
Main text size.
Stamp width.
Stamp height.
Outer border width.
Padding around the stamp.
Stamp quality in percentage. (Quality below 100% adds gaps and missing ink spots.)
Create an inverted stamp design. Its background gets filled and elements get cut out.
Select the stamp border's style.
Secondary text of the stamp.
Inner border's width.
Decorate the stamp with stars.
Decorate the stamp with lines.
Rotate the stamp by this angle. (Measured in degrees.)
Set the stamp color.
Set the text color.
Set the decoration color.
Set the background color.
Set the opacity of the stamp.
Choose the main text font.
Provide a custom font URL.
Select bold or italic font.
Choose the second text font.
Provide a custom font URL.
Select bold or italic font.
click me

Monogram Stamp

In this example, we create an elegant monogram stamp with the personal initials "J.S." in the center. The stamp's design is a circle, featuring a star pattern as its border. The initials are printed in a custom, cursive "Allura" font. The stamp has a transparent background, making it suitable for marking personal items and artwork.

Required options
These options will be used automatically if you select this example.
Choose your stamp's design.
Main text of the stamp.
Main text size.
Stamp width.
Stamp height.
Outer border width.
Padding around the stamp.
Stamp quality in percentage. (Quality below 100% adds gaps and missing ink spots.)
Create an inverted stamp design. Its background gets filled and elements get cut out.
Select the stamp border's style.
Secondary text of the stamp.
Inner border's width.
Decorate the stamp with stars.
Decorate the stamp with lines.
Rotate the stamp by this angle. (Measured in degrees.)
Set the stamp color.
Set the text color.
Set the decoration color.
Set the background color.
Set the opacity of the stamp.
Choose the main text font.
Provide a custom font URL.
Select bold or italic font.
Choose the second text font.
Provide a custom font URL.
Select bold or italic font.
click me

Delivery via Air Mail Stamp

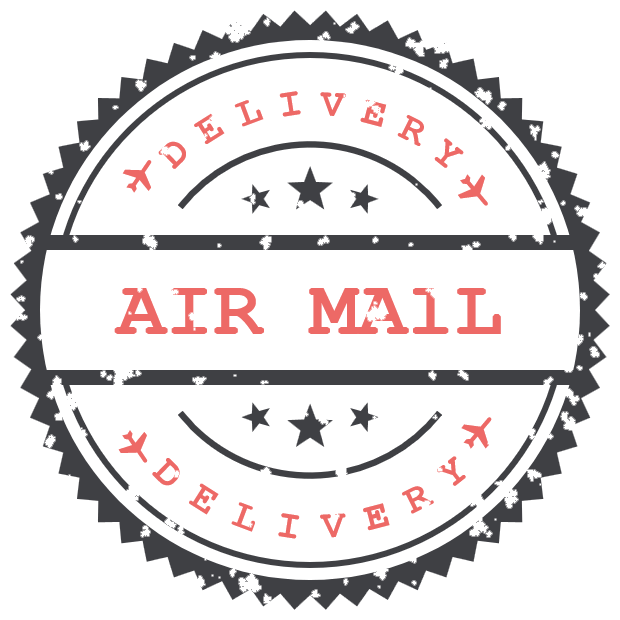
In this example, we generate a stylish "AIR MAIL" stamp for marking international mail packages. The stamp has a round shape with an inner text banner for the main text. Besides decorative lines and stars, we also add small Unicode airplane emojis ✈ to it. The stamp uses two colors – "LightCoral" for the primary and secondary text and "DarkSlateGray" for the border and decorations. The text family is set to the typewriter-style "Courier New" font that gives it an old-school mail look.

Required options
These options will be used automatically if you select this example.
Choose your stamp's design.
Main text of the stamp.
Main text size.
Stamp width.
Stamp height.
Outer border width.
Padding around the stamp.
Stamp quality in percentage. (Quality below 100% adds gaps and missing ink spots.)
Create an inverted stamp design. Its background gets filled and elements get cut out.
Select the stamp border's style.
Secondary text of the stamp.
Inner border's width.
Decorate the stamp with stars.
Decorate the stamp with lines.
Rotate the stamp by this angle. (Measured in degrees.)
Set the stamp color.
Set the text color.
Set the decoration color.
Set the background color.
Set the opacity of the stamp.
Choose the main text font.
Provide a custom font URL.
Select bold or italic font.
Choose the second text font.
Provide a custom font URL.
Select bold or italic font.
click me

White Marking Stamp

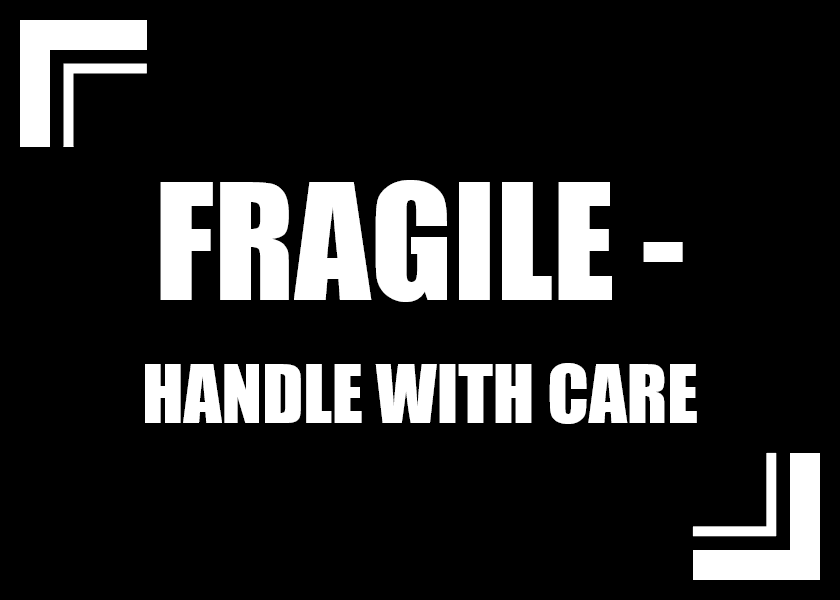
In this example, we create a white marking stamp placed on a black background. The stamp has bold, all-caps warning text that says "FRAGILE - HANDLE WITH CARE", written in the Impact font at the size of 150 pixels. It has a simple design with double-corner borders in the top left and bottom right. This stamp works great on black shipping boxes, as the white ink ensures high visibility on dark surfaces.

Required options
These options will be used automatically if you select this example.
Choose your stamp's design.
Main text of the stamp.
Main text size.
Stamp width.
Stamp height.
Outer border width.
Padding around the stamp.
Stamp quality in percentage. (Quality below 100% adds gaps and missing ink spots.)
Create an inverted stamp design. Its background gets filled and elements get cut out.
Select the stamp border's style.
Secondary text of the stamp.
Inner border's width.
Decorate the stamp with stars.
Decorate the stamp with lines.
Rotate the stamp by this angle. (Measured in degrees.)
Set the stamp color.
Set the text color.
Set the decoration color.
Set the background color.
Set the opacity of the stamp.
Choose the main text font.
Provide a custom font URL.
Select bold or italic font.
Choose the second text font.
Provide a custom font URL.
Select bold or italic font.
click me

Handcrafted Since 1985 Badge

This example generates a circular badge with the text "HANDCRAFTED SINCE 1985". The main text in the middle says "SINCE 1985", highlighting the long history of our brand, and the additional text says "HANDCRAFTED", signifying the time-tested quality and tradition of our products. The badge's design features a wavy border and decorative stars that separate the main and secondary text. The stamp is filled with a solid dark gray color but remains slightly transparent (20% transparent and 80% opaque). Additionally, the stamp has a custom tilt of 20 degrees and a quality setting of 70%, giving it a damaged ink look and a slightly aged effect.

Required options
These options will be used automatically if you select this example.
Choose your stamp's design.
Main text of the stamp.
Main text size.
Stamp width.
Stamp height.
Outer border width.
Padding around the stamp.
Stamp quality in percentage. (Quality below 100% adds gaps and missing ink spots.)
Create an inverted stamp design. Its background gets filled and elements get cut out.
Select the stamp border's style.
Secondary text of the stamp.
Inner border's width.
Decorate the stamp with stars.
Decorate the stamp with lines.
Rotate the stamp by this angle. (Measured in degrees.)
Set the stamp color.
Set the text color.
Set the decoration color.
Set the background color.
Set the opacity of the stamp.
Choose the main text font.
Provide a custom font URL.
Select bold or italic font.
Choose the second text font.
Provide a custom font URL.
Select bold or italic font.
click me

Best Seller Stamp

In this example, we create a rectangular "BEST SELLER" stamp with rounded corners. The stamp has a wavy border style and its design uses the green color for all its elements. It is rotated by 15 degrees clockwise, giving it an informal look. The stamp's quality setting is 40%, making it faded and worn. The text is written in bold capital letters of size 70 pixels and uses the "Comic Sans MS" font, making it large, clear, and easy to read.

Required options
These options will be used automatically if you select this example.
Choose your stamp's design.
Main text of the stamp.
Main text size.
Stamp width.
Stamp height.
Outer border width.
Padding around the stamp.
Stamp quality in percentage. (Quality below 100% adds gaps and missing ink spots.)
Create an inverted stamp design. Its background gets filled and elements get cut out.
Select the stamp border's style.
Secondary text of the stamp.
Inner border's width.
Decorate the stamp with stars.
Decorate the stamp with lines.
Rotate the stamp by this angle. (Measured in degrees.)
Set the stamp color.
Set the text color.
Set the decoration color.
Set the background color.
Set the opacity of the stamp.
Choose the main text font.
Provide a custom font URL.
Select bold or italic font.
Choose the second text font.
Provide a custom font URL.
Select bold or italic font.

All PNG Tools

Didn't find the tool you were looking for? Let us know what tool we are missing and we'll build it!
Quickly replace any color in a PNG file with transparency.
Quickly swap colors in a PNG image.
Quickly replace all colors in a PNG with a single color tone.
Quickly create a translucent or semi-transparent PNG.
Quickly add noisy pixels (white noise) to your PNG image.
Quickly make a PNG image smaller and reduce its size.
Quickly convert a PNG graphics file to a JPEG graphics file.
Quickly convert a JPEG graphics file to a PNG graphics file.
Quickly convert a WebP image to a PNG image.
Quickly convert a PNG image to a WebP image.
Quickly convert an SVG file to a PNG image.
Quickly convert a PNG image to base64 encoding.
Quickly convert a base64-encoded image to PNG.
Quickly open and view a PNG and its components in your browser.
Quickly show how a PNG looks on various background colors.
Quickly remove the alpha channel and transparency from a PNG.
Quickly fill the alpha channel in a PNG with a specific color.
Quickly replace the alpha channel in a PNG with opaque pixels.
Quickly extract transparent areas (alpha channel) from a PNG.
Quickly get detailed information about a PNG file.
Quickly calculate the file size of a PNG image in bytes or kilobytes.
Quickly find the width, height and aspect ratio of a PNG image.
Quickly check whether the PNG is vertical or horizontal.
Quickly find the number of colors in a PNG image (and print them).
Quickly use the eyedropper to find a pixel's color in a PNG.
Quickly find the most popular colors in a PNG.
Quickly extract RGBA, CMYK, and HSL color channels from a PNG.
Quickly split a PNG into its RGB(A) components (Red, Green, Blue, and Alpha).
Quickly split a PNG into its HSL components (Hue, Saturation, Lightness).
Quickly split a PNG into its HSV components (Hue, Saturation, Value).
Quickly split a PNG into its CMYK components (Cyan, Magenta, Yellow, and Key).
Quickly split a PNG into its YCbCr components (Y, Cb, or Cr).
Quickly increase or decrease the quality of PNG images.
Quickly change the orientation of the PNG from landscape to portrait.
Quickly change the orientation of the PNG from portrait to landscape.
Quickly resize a PNG image to any size.
Quickly rotate a PNG image by an arbitrary angle.
Quickly crop a PNG image.
Quickly cut out a key part of a PNG image.
Quickly center objects within a transparent PNG image.
Quickly skew a PNG horizontally or vertically by any angle.
Quickly shift a PNG and swap its halves or quadrants.
Quickly make a PNG fit perfectly in an arbitrary size rectangle.
Quickly add text (label, caption) to a PNG picture.
Quickly superimpose a message or a signature on a PNG.
Quickly add a border around a PNG.
Quickly remove a border or decoration around a PNG.
Quickly add a background to a PNG image.
Quickly remove the background from a PNG image.
Quickly remove a specific color from a PNG image.
Quickly smooth the edges of PNG images.
Quickly flip a PNG picture horizontally.
Quickly flip a PNG picture vertically.
Quickly create a mirror version of the given PNG.
Quickly reverse the direction of a PNG image.
Quickly make copies of a PNG pic.
Quickly clone PNGs and arrange them into rows, columns, or grids.
Quickly pixelate an area of a PNG image.
Quickly blur an area of a PNG image.
Quickly hide an area in a PNG image.
Quickly sharpen an area of a PNG image.
Quickly zoom in a PNG or zoom out a PNG.
Quickly increase the width and height of a PNG.
Quickly decrease the width and height of a PNG.
Quickly change the brightness of a PNG picture.
Quickly change the contrast of a PNG picture.
Quickly convert a color PNG image to a grayscale PNG.
Quickly apply a sepia effect to a PNG photo.
Quickly change the hue of a PNG photo.
Quickly invert pixel colors in a PNG photo.
Quickly reverse colors in a specific area of a PNG image.
Quickly round the corners of a PNG picture.
Quickly make sure that the given file has the PNG format.
Quickly determine whether the PNG is entirely grayscale or not.
Quickly check if a PNG file has any transparent pixels.
Quickly generate an alpha mask of a transparent PNG.
Quickly visualize transparent regions of a PNG.
Quickly create a silhouette from a PNG image.
Quickly create a stencil from a PNG image.
Quickly replace transparency in a PNG file with a solid color.
Quickly convert a PNG graphics file to a single-frame GIF.
Quickly convert a GIF animation to a PNG picture.
Quickly convert a PNG picture to a bitmap file.
Quickly convert a bitmap image file to a PNG picture.
Quickly convert an ICO (icon) file to a PNG file.
Quickly convert a PNG image to a Data URL.
Quickly convert a Data URL to a PNG image.
Quickly convert a PNG to the list of hex codes.
Quickly convert the list of hex codes to a PNG.
Quickly convert a PNG to the list of RGB values.
Quickly convert the list of RGB values to a PNG.
Quickly optimize the quality and file size of a PNG photo.
Quickly make a symmetric copy of the given PNG.
Quickly create a single-color or multi-color PNG picture.
Quickly generate a PNG with a color spectrum.
Quickly generate a PNG with a multi-color gradient.
Quickly generate a gradient palette in PNG format.
Quickly write text and create a PNG image from it.
Quickly create a PNG from emojis and other Unicode symbols.
Quickly add JPG and WebP artifacts to a PNG photo.
Quickly create a single 1-by-1 pixel PNG file.
Quickly generate random PNG pictures.
Quickly draw a PNG image using only two colors.
Quickly turn a color PNG image into a black and white PNG.
Convert a PNG image to a single-color PNG image.
Quickly create a dithered PNG image.
Quickly decrease the number of colors in a PNG image.
Quickly create a swirl of pixels anywhere on a PNG.
Quickly reduce the number of distinct colors in any PNG image.
Quickly create a polaroid image from a PNG.
Quickly create a poster from a regular PNG image.
Quickly remove the green screen background from a PNG.
Quickly create a PNG signature with a transparent background.
Quickly change the color of a PNG signature.
Quickly improve the quality of a digital signature.
Quickly convert a colorful signature to just black-and-white.
Quickly rotate a digital signature and make it horizontal.
Quickly crop a digital signature from a PNG.
Quickly resize a digital signature.
Quickly clean up pixels around digital signature edges.
Quickly fill transparent areas of a digital signature.
Quickly remove the background from a scanned signature.
Quickly convert a thin signature to a thick signature.
Quickly convert a thick signature to a thin signature.
Quickly convert a JPG signature to a transparent PNG signature.
Quickly convert a PNG signature to a JPG signature.
Quickly extract a signature from a photo or scanned document.
Quickly create a PNG that's entirely filled with just one color.
Quickly create a blank PNG with a transparent, translucent, or opaque fill.
Quickly create a PNG that's entirely filled with white noise.
Quickly erase any part of a PNG image.
Quickly extract objects by color from a PNG image.
Quickly split a PNG image into separate color-based layers.
Quickly apply a shadow effect to a PNG image.
Quickly add an outline around objects in a PNG.
Quickly remove a stroke from around objects in a PNG.
Quickly encircle objects within a PNG with an outline.
Quickly clear PNG elements from the encircled outline.
Quickly add a glowing effect to PNG image objects.
Quickly add a transparent or opaque padding to a PNG.
Quickly add extra empty space to the sides of a PNG.
Quickly remove unnecessary space around a PNG image.
Quickly swap two colors in a PNG image.
Quickly produce multiple duplicates of a PNG image.
Quickly sort pixels or pixel blocks in a PNG image by color.
Quickly add a block effect to a PNG image.
Quickly shuffle pixels or pixel blocks in a PNG.
Quickly convert any color in a logo into transparency.
Quickly replace the background color in a PNG logo.
Quickly make your logo backgrounds transparent.
Quickly add an opaque background to a transparent logo.
Quickly update colors in a logo.
Quickly rotate a PNG logo to the perfect angle.
Quickly resize a PNG logo to any size.
Quickly remove unwanted pixels from logo edges.
Quickly remove the unwanted part of the logo in PNG format.
Quickly create a monochrome version of a colorful PNG logo.
Quickly add customized text to a PNG logo.
Quickly create a unique logo from any text input.
Quickly select and extract any color used in a PNG logo.
Quickly extract and visualize the color palette of a logo.
Quickly convert a PNG logo into a unified, single-color version.
Quickly add extra space around a PNG logo.
Quickly remove extra space around a PNG logo.
Quickly apply an outline to all elements of a PNG logo.
Quickly transform a PNG logo file to a JPG format.
Quickly transform a JPG logo file to a transparent PNG format.
Quickly transform a PNG logo file to a WebP format.
Quickly transform a WebP logo file to a PNG format.
Quickly transform an SVG logo file to a PNG format.
Quickly separate a PNG logo into individual color layers.
Quickly add a shadow to all elements of a PNG logo.
Quickly align a logo to the center of a PNG.
Quickly make any icon background transparent.
Quickly replace one color in the icon with another.
Quickly create unique PNG icons from emojis.
Quickly create a grayscale version of a PNG icon.
Quickly create perfectly symmetrical PNG icons.
Quickly mirror a PNG icon horizontally or vertically.
Quickly generate a visual and textual color palette of the PNG icon.
Quickly refine and clean up PNG icon edges.
Quickly fill transparent areas of a PNG icon with a background.
Quickly extract a PNG icon from its background.
Quickly adjust the visibility of a PNG logo.
Quickly crop a PNG icon to the desired shape and size.
Quickly rotate a PNG icon clockwise or counterclockwise.
Quickly customize the dimensions of a PNG icon.
Quickly add a rectangular, rounded, or circular border around the icon.
Quickly remove a rectangular or circular border around the icon.
Quickly overlay text on a PNG icon.
Quickly turn any character or emoji into a PNG icon.
Quickly convert a PNG icon to a single solid color.
Quickly align an icon to the center of a PNG.
Quickly add an outline to a PNG icon.
Quickly extract individual color layers from a PNG icon.
Quickly add a custom shadow to a PNG icon.
Quickly create empty space around a PNG icon.
Quickly remove unwanted space around a PNG icon.
Quickly identify any color within a PNG icon.
Quickly create a perfectly square PNG icon.
Quickly create a perfectly round PNG icon.
Quickly convert JPG icons to PNG format with transparency.
Quickly convert PNG icons to JPG format.
Quickly convert WebP icons to PNG format.
Quickly convert PNG icons to WebP format.
Quickly increase the thickness of a PNG icon.
Quickly reduce the thickness of a PNG icon.
Quickly transform a contour-based icon into a filled design.
Quickly transform a filled icon into a contour-based design.
Quickly create a semi-transparent PNG icon.
Quickly convert non-transparent stamps and seals into transparent ones.
Quickly change the colors of digital stamps and seals.
Quickly remove the background from a photo of a stamp or seal.
Quickly add a solid color background to a stamp or seal.
Quickly adjust the rotation angle of a digital stamp or seal.
Quickly adjust the dimensions of a rubber stamp or seal.
Quickly cut an oval or rectangle from a digital stamp or seal.
Quickly remove decorative borders from digital stamps and seals.
Quickly convert a multi-color stamp or seal to black-and-white.
Quickly recolor a stamp or seal to just one color.
Quickly create a monochromatic version of a stamp or seal.
Quickly convert stamps and seals into translucent watermarks.
Quickly improve the quality of poorly scanned stamps or seals.
Quickly add extra space around a digital stamp or seal.
Quickly remove padding from a scanned stamp or seal.
Quickly convert a scan or photo of a stamp into a digital stamp.
Quickly design a personalized stamp with unique text and style.
Quickly convert any text into a digital stamp or seal.
Quickly generate custom digital date and time stamps and seals.
Quickly design a personalized initials stamp or seal.
Quickly design a professional round or oval stamp.
Quickly design a professional rectangular or square stamp.
Quickly create a green approval/success stamp or seal.
Quickly create a digital PNG stamp from a scanned image.
Quickly extract a barcode from any image and save it as a PNG.
Quickly generate a PNG grid with custom rows and columns.

Coming Soon

These PNG tools are on the way!
PNG Editor

Edit a PNG in your browser.

Compare PNG Images

Compare two or more PNG images.

Slowly Reveal a PNG

Create an animation that slowly reveals a PNG image.

Convert PNG to AVIF

Convert a PNG image to an AV1 image (AVIF).

Convert AVIF to PNG

Convert an AV1 image (AVIF) to a PNG image.

Convert PNG to HEIF

Convert a PNG image to a High Efficiency Image File (HEIF).

Convert HEIF to PNG

Convert a Hide Efficiency Image File (HEIF) to a PNG image.

Convert PNG to ICO

Convert a PNG image to an ICO icon.

Convert PNG to TIFF

Convert a PNG image to a TIFF image.

Convert TIFF to PNG

Convert a TIFF image to a PNG image.

Convert PNG to PIK

Convert a PNG image to a PIK image.

Convert PIK to PNG

Convert a PIK image to a PNG image.

Convert PNG to PPM

Convert a PNG image to a PPM image.

Convert PPM to PNG

Convert a PPM image to a PNG image.

Convert PNG to BPG

Convert a PNG image to a BPG image.

Convert BPG to PNG

Convert a BPG image to a PNG image.

Convert PNG to FLIF

Convert a PNG image to a FLIF image.

Convert FLIF to PNG

Convert a FLIF image to a PNG image.

Convert PNG to PDN

Convert a PNG image to a Paint.net file.

Convert PDN to PNG

Convert a Paint.net file to a PNG image.

Convert PNG to PSD

Convert a PNG image to a Photoshop file.

Convert PSD to PNG

Convert a Photoshop file to a PNG image.

Convert PNG to SVG

Convert a PNG image to an SVG image.

Convert PNG to PDF

Convert a PNG image to an PDF document.

Convert PDF to PNG

Convert a PDF document to a PNG image (or multiple images).

Convert PNG to EPS

Convert a PNG image to an EPS file.

Convert EPS to PNG

Convert an EPS file to a PNG image (or multiple images).

Convert PNG to JFIF

Convert a PNG image to a JFIF image.

Convert JFIF to PNG

Convert a JFIF image to a PNG image.

Convert PNG to RGB

Convert a PNG image to raw RGB values.

Convert RGB to PNG

Convert RGB values to a PNG image.

Convert PNG to BGR

Convert a PNG image to raw BGR values.

Convert BGR to PNG

Convert BGR values to a PNG image.

Convert PNG to RGBA

Convert a PNG image to raw RGBA values.

Convert RGBA to PNG

Convert RGBA values to a PNG image.

Convert PNG to BGRA

Convert a PNG image to raw BGRA values.

Convert BGRA to PNG

Convert BGRA values to a PNG image.

Convert PNG to Animated GIF

Convert multiple PNGs to a GIF animation.

Convert APNG to GIF

Convert an APNG animation to a GIF image.

Convert GIF to APNG

Convert a GIF animation to an APNG image.

Convert APNG to Webp

Convert an APNG image to a Webp image.

Convert Webp to APNG

Convert a Webp image to an APNG image.

Convert APNG to MP4

Convert an APNG image to an MP4 video.

Convert MP4 to APNG

Convert an MP4 video to an APNG image.

Convert APNG to AVI

Convert an APNG image to an AVI video.

Convert AVI to APNG

Convert an AVI video to an APNG image.

Convert APNG to WMV

Convert an APNG image to a WMV video.

Convert WMV to APNG

Convert an WMV video to an APNG image.

Extract APNG Frames

Extract all frames from an APNG image.

APNG Player

Play a PNG animation (APNG) frame by frame.

Change APNG Speed

Change the playback speed of an animated PNG (APNG).

Set APNG Loop Count

Change how many times an animated PNG loops.

Reverse an APNG

Reverse the order of frames in an animated PNG (APNG).

APNG Creator

Created animated PNGs (APNGs) from input images.

APNG Checker

Check if the given PNG file is an animated PNG file (APNG).

Convert APNG to Sprite Sheet

Create a sprite sheet from all animated PNG (APNG) frames.

Convert Sprite Sheet to APNG

Create an animated PNG (APNG) from a sprite sheet.

Convert PNG to XLS

Create Excel art from a PNG image.

Create a Glitch PNG

Randomly distort data in a PNG file to make a glitched PNG.

Show Grayscale Pixels

Find all grayscale pixels in a PNG (grayscale mask).

Show Color Pixels

Find all color pixels in a PNG (color mask).

Invert Alpha Channel

Invert the alpha channel values in a PNG.

Split a PNG

Break a PNG image into multiple pieces.

Create a PNG Slideshow

Generate a slideshow animation from multiple PNGs.

Create a PNG Mosaic

Generate a mosaic wall from multiple PNGs.

Hexagonalize a PNG

Convert a PNG into a hexagonal grid of pixels.

Triangulate a PNG

Convert a PNG into a triangular grid of pixels.

Convert PNG to Voronoi Diagram

Create a Voronoi diagram from a PNG image.

Add Vignette Effect to a PNG

Darken PNG corners compared to its center.

Add Kaleidoscope Effect to a PNG

Create multiple reflections of a PNG.

Add Bayer Filter to a PNG

Apply a Bayer filter on a PNG.

Add Night Vision Effect to a PNG

Make a PNG look like it was taken via night vision goggles.

Add Spherical Effect to a PNG

Make a PNG look like it's spherical.

Apply Mobius Transform on a PNG

Run a PNG through the Mobius Transform.

Convert PNG Color Space

Convert between RGB, CMYK, HSV, and HSL color spaces.

Convert PNG Bit Depth

Convert between 8-bit, 16-bit, 24-bit, and 32-bit PNG depths.

Remove Dithering from a PNG

Remove dithering from a PNG image.

Create ASCII Art from PNG

Convert a PNG to an ASCII art image.

Create PNG from ASCII Art

Convert ASCII art to a PNG image.

Create ANSI Art from PNG

Convert a PNG to an ANSI art image.

Create PNG from ANSI Art

Convert ANSI art to a PNG image.

Create Braille Art from PNG

Convert a PNG to a Braille art image.

Create PNG from Braille Art

Convert Braille art to a PNG image.

Convert Bytes to PNG

Create a PNG image from the given bytes.

Convert PNG to Bytes

Convert a PNG image to bytes.

Enhance a PNG

Increase the quality of a PNG image.

Slice a PNG

Extract a 2d slice from a PNG.

Generate All-color PNG

Create a PNG that contains all possible RGB colors.

Extract Text from a PNG

Find all textual information in a PNG image and extract it.

Create a 3D PNG

Given any 2D PNG, add 3rd dimension to it.

Remove Text from a PNG

Quickly erase text (labels, captions) from a PNG.

Remove a Watermark from a PNG

Quickly delete a watermark from a PNG.

Fix a Broken PNG

Salvage a PNG that has bad bytes in it and doesn't open.

Hide Data in a PNG

Conceal a secret message in a PNG image.

Change PNG Metadata

Update meta data of a PNG file.

Erase PNG Metadata

Delete meta data from a PNG picture.

Validate PNG

Check if the given file is a valid PNG without errors.


Subscribe!

Subscribe to our updates. We'll let you know when we release new tools, features, and organize online workshops.

Enter your email here


Feedback. We'd love to hear from you! 👋

Created with love by

We're Browserling — a friendly and fun cross-browser testing company powered by alien technology. At Browserling we love to make people's lives easier, so we created this collection of online PNG tools. We created the simplest possible user interface for our tools and they are now used by millions of users every month. Behind the scenes, our online PNG tools are actually powered by our web developer tools that we created over the last couple of years. Check them out!

49K
@browserling

Didn't find the tool you were looking for? Let us know what tool we are missing and we'll build it!